Profile Manager
| Management > Profile Manager |
In the "Profiles" tab, the Profile Manager allows you to add and edit the profiles as well as define the devices that profiles should include.
In the "Profiles" tab, the left part panel lists the profiles that have been created for each site; the right part panel will display the related information when you select a profile that is listed in the left panel. In the screenshot below, you can see that there are currently two profiles: the 'demo' is a profile for site 'Business Park', while the 'Computer School' is a profile for site 'School'. The profile 'demo' has been selected and its information is displayed.
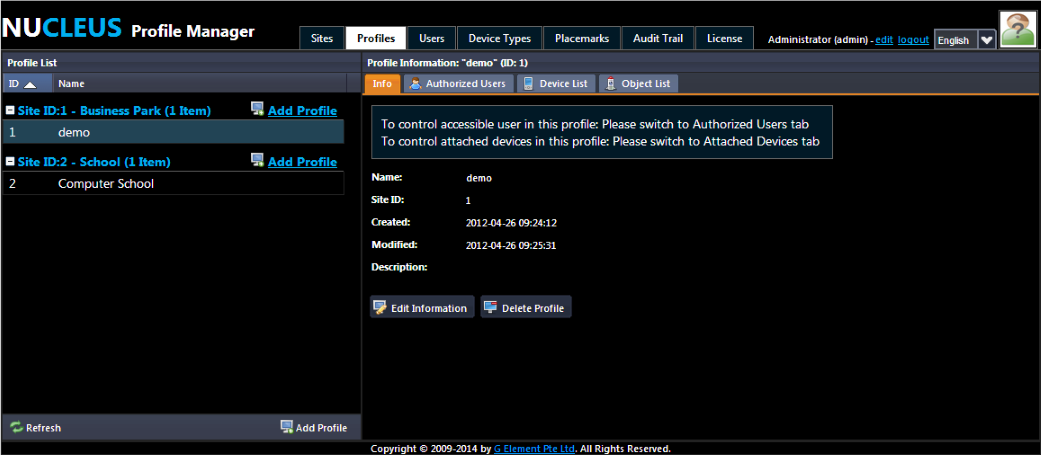
Meanwhile, for a selected profile, you can then click the "Edit Information" to update its basic information, including its name and description (note: you cannot update the ownership of a created profile; i.e. you are not allowed to change which site it belongs to). If you do not need the profile, you can click the "Delete Profile" to remove it.
If you want to add a profile, you need first click the  button in the left column.Then, a dialogue box that is illustrated as below will appear.
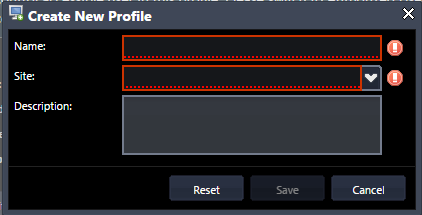
In this dialogue box, you need:
After these three steps, you can click the "Save"to create the profile. Alternatively, you can click the "Reset" to clear off your typed information or click the "Cancel" to cease the adding the profile.
For a selected profile, you can view the list of users who are authorized to access it in the "Authorized Users" tab. In the illustration below, we can see that the "demo" profile of "Business Park" site are currently authorized to two users for accessing: the first user is 'admin' of Administrator type, while the second is 'manager' of Manager type.
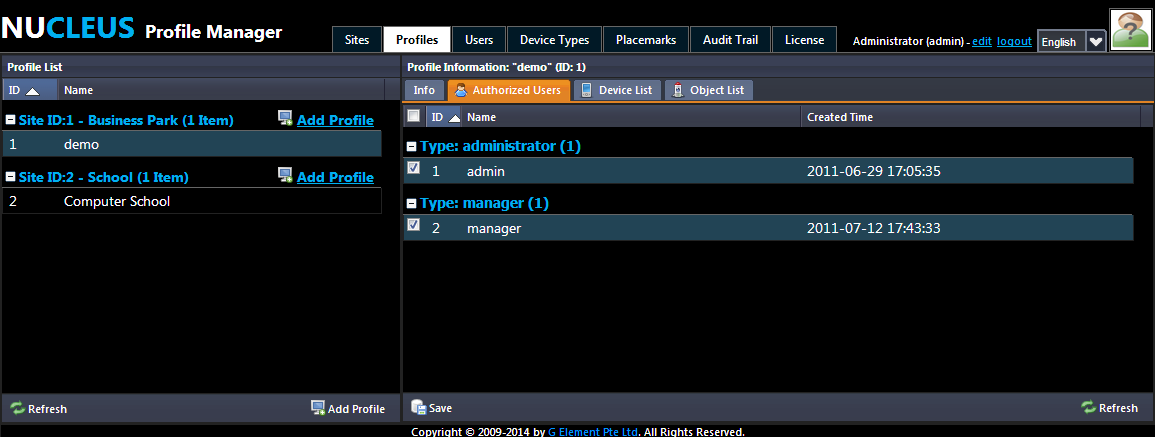
You can check the a user to authorize the user to access this profile, or you can withdraw the authorization by unchecking. After your check or uncheck operation, click "Save" to take effect.
For a profile, you can manage its list of devices in the "Device List" tab, as illustrated below.
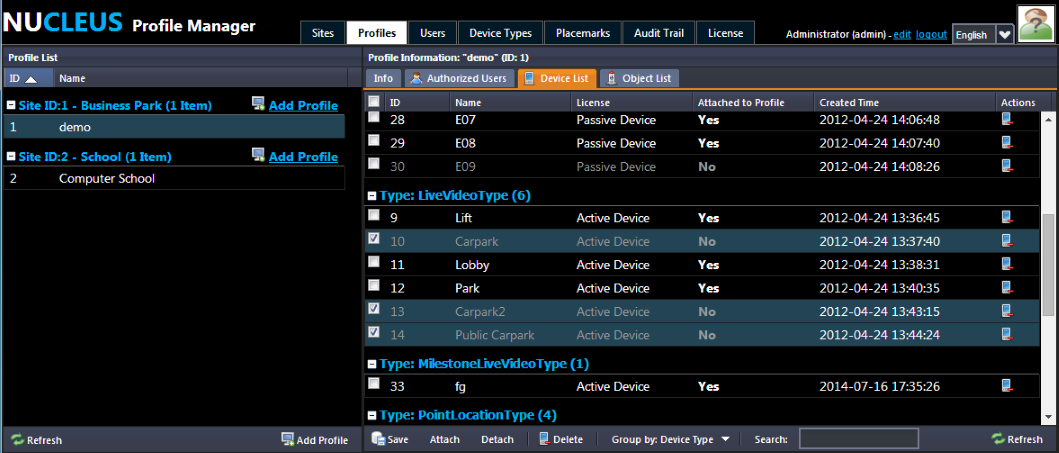
In this tab, it lists all the devices that have been added to the site as well as the devices of each profile. In the illustration above, the selected profile "demo" belongs to the "Business Park" site, and the list shows all the devices that have been added to this site. Each device is described by a set of columns, including its ID, name, license and whether it has been attached to the profile etc.
If you want to attach devices to a profile, you can do it by:
If you want to detach devices from a profile, you can do it by:
In the "Object List", it lists all the user objects that have been added to the site. Unlike devices, user objects are always shown on the 3D sites, so you do not have to attach them to a profile. In the illustration below, we can see the list of user objects that are contained in the 'Demo'.
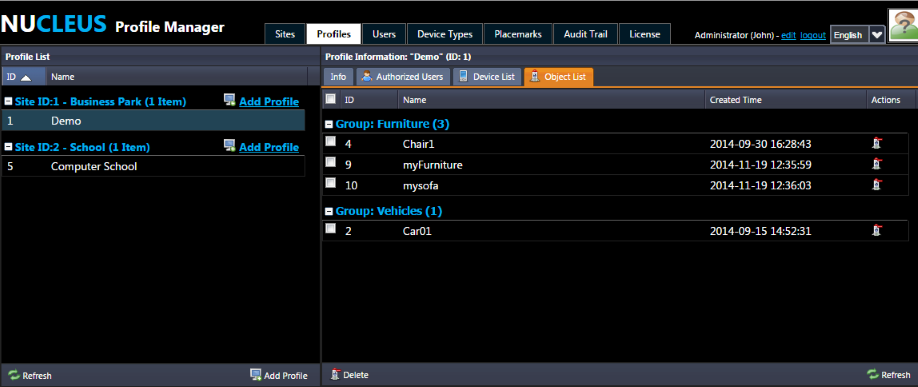
For a user object, you can delete it by clicking its  button. Alternatively, if you want to delete a batch of user objects, you can first check them, then click the
  button.